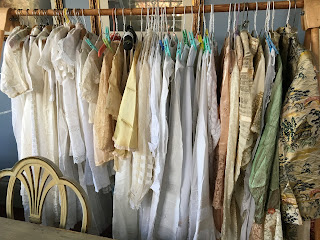
Years ago I took an evening upholstery course at Mohawk College in Stony Creek.
I enjoyed it so much that I took it about 7 times. I loved my teacher, John,who taught full time during the week at George Brown in Toronto.
I bought a compresser and pneumatic staple gun and I have never looked back. It is a very useful skill. Last week I was thrifting with my twin,Barb, and a stool came in as I was checking out. Of course I bought it and I am going to show the stages of re-upholstery.
This is the before picture. One of the most time consuming stages, is the striping off of the old fabric and everything else. If a piece is for resale,it has to have new material only and I have to be registered with the white material police.!!!
Always surprises. The plywood is rotten so it has to come off as well.
Wood underneath isn't too bad but I add a layer of
the fabric you use on top of springs to give more secure base.
I painted it all with chalk paint. Will finish that at end.
Put 1/2 inch edge roll around the edge. It gives a softer edge for the fabric, not just the sharp.edge of the wood. Ready to add stuffing.
This is a lovely product, unrefined cotton that even has the seeds in it. You never compress this or even cut with scissors. You tear it with your hands.
On top of this I put a layer of compressed Dacron. It is polyester .
On top of this I put a slightly larger piece of 1" foam.
Finally ready for fabric. Try to drape it so the pattern is even. Not easy. I start with three staples on all sides, smoothing the fabric as I go so there is no slack. Then I check if it is even and I add 3 staples on each side of the existing staples all the way round. That way all sides should be even and equal.
It looks odd but it prevents the fabric being pulled all to one side.
The flat side of the corners should go on the broad side of the stool or chair.
I made piping and sewed it to the fabric that covers the bottom part of stool. All seams in upholstery are 1/2" .
The small cardboard is pushed up against the back of the sewn on piping and stapled on an angle. I used the piece of cardboard to make sure the piping was the same level all the way around. You are doing it wrong side out and upside down.
Photo won't let me rotate it!! This is how the stapling looks.
Cardboard stiffener is in place.
I put a half layer of Dacron to cover any staples or bumps.
Then I pulled the skirt down and stapled it close to the bottom. I want to finish the bottom edge with white pompom trim but I seem to have sold all mine. What was I thinking?
I sanded back the white legs a bit and applied wax and polished them.
I hot glue the pompom trim on to cover the staples
and put a light dust cover on the bottom.
And that is a very brief synopsis of the many stages to re-doing a stool.
Before
After!


